If you decide to engage in rabbit breeding, then first of all you should prepare cages and rabbits feeders. Feeders come in different types, and we will talk about what they are and how to make them by hand, in this article.
- Main types of rabbits feeders
- A bowl
- Gutter
- Clear
- Bunker
- In the form of cups
- What you need for making
- Step-by-step instruction
Main types of rabbits feeders
Feeders for rabbits are chosen depending on the type of cage and the number of animals. We will tell about the main types of feeders in more detail.
A bowl
This is probably the most common container for food. It is factory-made and can be made from various types of materials. Often Bowls are made of ceramic, plastic or stainless steel. You can pour grain into bowls and pour water, but such feeders have one drawback: rabbits turn them over very often. Small bowls are well suited only for newly born animals. 
Gutter
Grooved feeders can be made by hand, and it does not take a lot of effort and knowledge. For the manufacture of the gutter, you need to prepare 6 boards, 2 of which will be used to make the bottom, 2 - on the long sides, and 2 more - on the short sides. Usually such food containers are made in the form of a cone.  Boards that are used for boards are trimmed at an angle and fixed with screws. Because of the narrow bottom, rabbits can easily get their food. In addition, several individuals can feed from the feeder gutters.
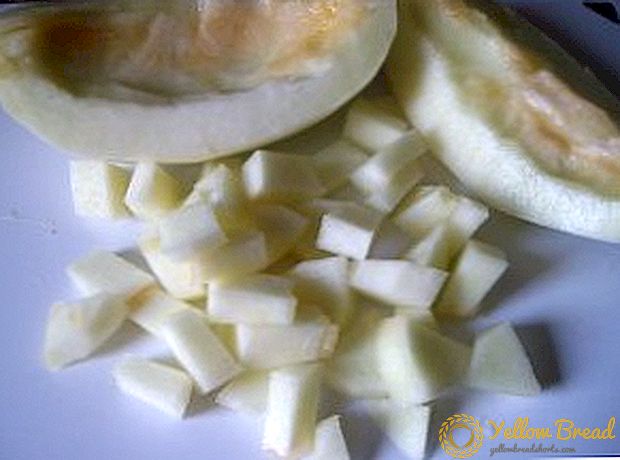
Clear
These types of food containers can be located both inside the cage and outside. Usually they are not made of plastic, as rabbits can gnaw through the nursery and get out of the cage. Nursery feeding devices are designed for hay. To make sennitsa at home, you need a few lids from glass jars and wire mesh.

The grid needs to be shaped into a cylinder and fastened on its sides with covers.Such a hay feeder is attached on the roof or on the wall of the cage. It always stays dry and you can easily get hay out of it. Sometimes this design is made in the form of a ball and hung from the ceiling. A clear hay container can also be made in the form of a cube, without using can lids. Such senniki fasten loops from a wire and fix on walls of cages.
Bunker
 Bunker feeders for rabbits can be made by hand. Bunker container for feed made of galvanized, using special drawings. Such designs are very convenient for use. For their manufacture will not need a lot of material and effort. Details on how to make such containers for food, we will describe below.
In the form of cups
Cup feeders for rabbits can be made from cans. To do this, use pliers to bend in sharp and uneven edges and, if necessary, reduce the height of the can, cutting it with metal scissors. 
Capacity for feeding rabbits in the form of a bowl can be made even from concrete. To do this, in the ground you need to make a form for pouring concrete, then pour the ready-made solution and wait until it hardens. Bowl feeder can be made from an ordinary iron bowl. These types of containers are often used for water.
What you need for making
Today we will tell you how to make a bunker trough with your own hands and which drawings to use for this. For its manufacture will need:
- drill with metal drill 5 mm;
- 60 × 60 cm galvanization (maybe less, but usually newcomers get a lot of waste);
- rivet gun;
- 14 rivets;
- scissors for metal;
- flat pliers;
- ruler;
- marker;
- gloves (for safety).
 If you have a vice, they can also be useful - bending the metal in them is much easier. But if you do not have a vice, then you can use an ordinary chair or table for bending.
Step-by-step instruction
Before starting work, make sure that the electric drill is working. Put on gloves from a thick fabric, otherwise there is a risk of cutting yourself on sharp galvanization. Examine the drawings and proceed to metal processing.Use step by step instructions:
- To begin with, cut a sheet of 41 × 18 cm in size from galvanization. You will have a piece in the shape of a parallelepiped. At the edges with a side of 18 cm, measure 1.5 cm toward the center of the parallelepiped and draw lines perpendicular to the base. At the corners on the left side, measure 2 squares with sides of 1.5 cm and cut them with scissors for metal. On the right side, measure the same squares, but do not cut them. Make cuts on one side of the square (on the side of the parallelepiped, which is 18 cm long). For clarity, see the drawings.
- Next, cut two identical pieces of galvanized 26.5 × 15 cm. On the underside (length 15 cm) cut a semicircle with a radius of 8 cm. On the opposite side at the corners cut squares with sides of 1.5 cm (the same as for the previous one). details). From the end of all three sides (except the part with a semicircle) measure 1.5 cm and draw lines parallel to the sides of the parallelepiped with a marker. When marking these parts can use the drawing.
- Now we need to do one more, the last detail. To do this, cut a parallelepiped measuring 27 × 18 cm. From the edges of each base, mark 1.5 cm and draw parallel lines.At each corner of the plate, cut squares with a side of 1.5 cm. Now, from the end of the right base, mark 5.5 cm toward the center and draw a line parallel to the smaller side. Do the same on the left side, only there you need to mark 6.5 cm. From all four bases of the plate, make cuts 1.5 cm in the middle of the parallelepiped (cuts are made strictly along the lines "5.5 cm" and "6.5 cm" that you spent). This is done so that in future all the incisions can be bent. By the way, the marking on the left side of the plate, where the 6.5 cm side is marked, is not needed (meaning the 1.5 cm line, which is perpendicular to the smaller side of the parallelepiped).
- Now proceed to bending the edges of the parts. Let's start with the very first plate, in which we cut two small squares on the left side. Along the lines that are marked at the edges (lines of 1.5 cm), bend. You can use a vice or bend by hand. The side where the squares are cut, bend down so that the bend is perpendicular to the base of the parallelepiped. From the second side we make the same bend, just up (remember that on this side we didn’t cut the squares, but made only cuts on one side, therefore we bend the entire strip upwards, and the squares of 1.5 × 1.5 cm along the edges leave unbent).


- Next, take two identical parts with semicircles. They will be curled in the same way too. The strip, which is opposite the semicircle, is bent upwards. And two strips along the edges, which are perpendicular to the semicircle, are bent down. They should also be marked with 1.5 cm.
- Now the last, most difficult part. Before bending it better to carefully read the drawing. To begin with, we bend a part with a mark of 6.5 cm upward at 45 °. Its end (a line at 1.5 cm in depth) is bent down perpendicularly to the side that you have bent at 45 °. Next, we bend 45 ° down the part with a mark of 5.5 cm. And just like in the previous case, we bend its edge, only up. All lateral edges, with a mark of 1.5 cm, bend down, perpendicular to the base. Only the section that is 6.5 cm long is not bent (we wrote about this above, there was no need to mark it).
- Now look at the drawing and try to understand the correct mechanism for assembling parts. Place two identical plates parallel to each other so that the curved sides are located outside.The part in which we folded the plate parts at an angle of 45 ° should be located between two parts with semicircles. The section of the plate with a width of 6.5 cm, where the edges do not bend, must “lie down” on the ends of the plates parallel to it. In this place you need to fasten the parts with rivets on both sides. Also, rivets fasten bent places (5.5 cm wide) and two semicircles.
- Next, turn over the resulting part and put on it the last part curved inside. Rivet 3 rivets on each side. The lower part, where there are no cut squares, is bent in a semicircle and attached to the end part of identical parts. Four holes are made at the bottom of the newly rounded part, and on the opposite side two parallel galvanized strips (size 6 × 1.5 cm) are attached with rivets for fastening the feeder.
- All places where moisture can get in the rain, you need to lubricate silicone.