Fallen snow usually brings with it a good mood, beautiful landscapes and ... additional efforts for owners of private houses. Its abundance can make it difficult to move around the yard, leaving the car, and generally leaving the room. Therefore, in winter, a snow shovel becomes one of the main tools for residents of the private sector or summer residents. In this article we will share with you the technology, how to make a snow shovel with your own hands, and also show you what materials it is better to make.
- How to make a wooden snow shovel do it yourself
- Bucket manufacture
- How to make a cutting for a shovel
- Making snow shovels from plastic
- What to make the bucket: prepare the material for the shovel
- How to make a shovel holder for your own hands
- How to make a snow shovel of aluminum with your own hands
- How to make a dipper for a shovel with your own hands
- Making and mounting cuttings
- Aluminum, plywood or plastic - which is better
Of course, you can not wrestle and not get hung up, and buy a ready-made device for snow removal in the store. However, if you have the necessary materials, tools and a few hours of free time, why not use them to make it yourself.After all, this way you can, firstly, save money, and secondly, you will get satisfaction from the results of your own work. In addition, you can make baby shovels, comfortable and appropriate in size for your little helpers. For the manufacture of a shovel with their own hands fit wood, plastic or aluminum. To learn how to make a tool for snow removal from different materials, read about the advantages and disadvantages of each of them below.
How to make a wooden snow shovel do it yourself
A securely made wooden shovel can last for five to six years. Materials that are often present in the household of a person who loves tinkering will be used to make it.
So, to make a wooden shovel for snow removal, you will need:
materials:
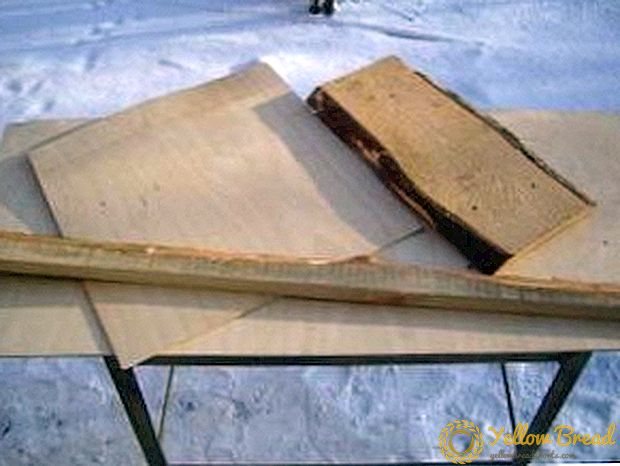 a sheet of plywood of size 45 (50) x 45 (50) (for a nursery - 30 x 30) and 6 mm thick;
- board 45 (50) cm long (or 30 cm, depending on the width of the spade), 2.5 cm thick;
- cutting from an old shovel or rake, a bar (length - 2 m, width - 4-6 cm, thickness - 2.5 cm);
- thin metal plate or tin strip 5-7 cm wide;
- nails, screws;
 a sheet of plywood of size 45 (50) x 45 (50) (for a nursery - 30 x 30) and 6 mm thick;
- file or jigsaw;
- plane;
- hammer;
- pliers;
- chisel;
- sandpaper.
Bucket manufacture
First, prepare the basis for fixing plywood. Take the board and plow it with a plane from all sides to a smooth flat surface. We place the board on the workbench horizontally, its underside must remain even, and the top must be cut out in an arc. We draw a arc with a pencil, in the center it should be equal to 8 cm, at the edges - 5 cm. We cut off excess wood. So we should get the end of a shovel. 
 In the center of the butt it is necessary to mark the cut in the shape of a rectangle, where the spade handle will be attached. The width of the cut should be equal to the width of the cutting, and the depth of one side and the other side of the rectangle must be made different - so that the holder is attached to the shovel at an angle. So, one side should be equal to 4 cm, the second - 4.5 cm. A small bevel with a size of 0.5 mm will allow the cutting to sit well, and it is convenient for you to work with the tool. "Nest" for planting the cutting is done with a jigsaw and chisel.
Next, the finished end must be connected with a plywood sheet - the working part of the shovel. To do this, you need three nails or screws. Find the center of plywood and the center of the butt and connect them with a nail. Then we hammer nails along the edges, thus attaching the edges of the plywood and the butt. Snow shovel bucket ready.
How to make a cutting for a shovel
If you decide not to use a purchase handle for a shovel, as well as make it yourself, then you will need a board or rake 2 m long (for a nursery - we select for a child’s height) and 2.5 cm wide.
The advantages of this method are that you can make it of any shape - rectangular or round. The board or rail used to make the holder must not contain knots. 
Ready stalk attached to plywood. To do this, calculate the place of its fastening with the help of a roulette. The entry points of the nails should be noted on the back of the plywood sheet.
Be careful, as incorrect markings can cause the holder to sit awkwardly and make it difficult to work with a shovel.
 And in the end, in order for your homemade snow removal to be durable and last for a long time, it must be reinforced with metal stripes. For them, either galvanized iron from the roof or tin cans are suitable. For their cutting will need scissors for metal.
  We cut a plate 50-60 cm wide under the bottom edge - a little more than the width of a shovel bucket. The length of the plate should be 6 cm. Bend it in half. Then we put the hem on the bottom of the bucket and fasten, bending the protruding sides. Attach the hem with three nails. In the same way we embed the butt joint with a shovel. Using self-tapping screws, fasten a metal plate with a length of 10 cm and a width of 4-5 cm at the point of entry of the cutting into the end portion. The junction of the holder with plywood on the reverse side is also reinforced with a small piece of a metal plate.
  The cutting can be opened with varnish, and the plywood can be smeared with impregnations to prevent ingress of moisture. Snow-shovel "hand-made" is ready. Keep it in a warm room, but away from heaters. With proper handling and storage, it can serve you for five winters.
Making snow shovels from plastic
A small plastic shovel is quite suitable for clearing the walkway from the house. Let's try to make such an option. You will need:
- a piece of high-quality plastic with dimensions of 45 x 45 or 50 x 50 cm;
- wire;
- wooden holder;
- aluminum plate;
- jigsaw or hacksaw;
- screwdriver;
- self-tapping screws.
What to make the bucket: prepare the material for the shovel
For a bucket, for example, a plastic bowl or other container may be suitable. The main thing is that the plastic was hard and well bent. Before engaging, it must be tested for strength. Make every effort to break it. If the plastic bends well and does not break, then the material for the shovel will do.
You can cut the required size of the scoop with an electric jigsaw or hacksaw for metal. You should not seek smooth edges, because the edge of a shovel and so quickly sharpened about the snow when working. 
How to make a shovel holder for your own hands
We have already written above about how to make a holder for a shovel with our own hands - in the technology of making wooden shovels. It can be safely used for plastic shovels.
In addition to wood, the holder can also be plastic and aluminum. The handle is attached to the plastic using wire. In the plastic part, we make four holes with a hot nail: two in the place of contact with the handle, two in the place where it comes to the end of the plastic.In them we push the wire and fasten the holder.
A harder way is to attach the cutting with iron plates. To attach it using a screwdriver. One plate will hold the cutting, the second is mounted in a place where the end of the holder is in contact with the shovel.
A plastic snow shovel with their own hands can last a little longer than wood or metal, and is convenient due to its low weight.
How to make a snow shovel of aluminum with your own hands
Under an aluminum shovel bucket, for example, you can put a lid on an old 60-liter saucepan, a washing machine, or another metal object measuring 60 by 40 cm. The required size can be made with a metal file or grinder. You will also need:
- a metal or steel strip 3 cm wide, 2-3 mm thick;
- electric drill;
- rivet gun;
- hammer;
- wooden stalk;
- varnish
How to make a dipper for a shovel with your own hands
If the aluminum that you use under your own snowplow is thin, it will need to be reinforced with metal strips, the length of which should correspond to the length of each side of the scoop - 40 and 60 cm.In the strips it is necessary to make holes every 4 cm. We attach them with rivets.
Making and mounting cuttings
The cutting can be made in the same way as in the version with a wooden shovel, or take ready. We fix it to aluminum using metal plates. Cut one 8-10 cm long, put it on top of the handle and hammer it in until the edges of the plate touch the aluminum bucket. Along the edges we drill two holes and insert rivets.
The second metal tape is placed 10 cm below on the holder. We fasten with rivets.
The holder is coated with varnish. After it dries, you can try the shovel in practice. If the tool is used only for snow removal, it can serve you for a long time.
There is another way to make an iron shovel for snow - from an old baking sheet. The wooden end and the holder are attached to the scoop-tray with screws. It will take 15-20 minutes to make such a tool. 
Aluminum, plywood or plastic - which is better
To understand this question, we will try to list the advantages and disadvantages of each of the materials for the shovel.
We think that every person who has ever done manual snow removal understands that the tool for this process should be:
- easy;
- comfortable;
- hoisting.
More snow will be able to hold iron shovels. And for a tool made of wood, it is easier to find the necessary materials, you will need simple tools and it is easier to make it.
We considered several options for how to make a snow shovel. We are confident that the craftsmen of all trades can come up with a few more, using other materials. Experiment, and the work of cleaning the snow will not be a burden for you, but pleasant troubles.