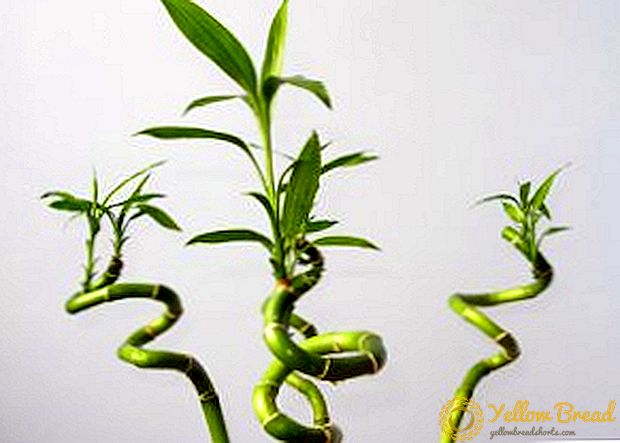
Clematis - Climbing plant that adorns the garden with flowers of various shapes and colors, which last almost all summer. Grow clematis on a support, because the only way a plant can open in all its glory.
Most often, it is done independently, which allows to take into account all the nuances of the site and the gardener's design preferences.
- What is a clematis support for?
- What you need to create support for clematis
- How to make a support for clematis do it yourself
- Wicker support of twigs
- How to make a trellis using wooden beams
- Creating a support for clematis from the netting of the chain-link
- How to make an arch for clematis
- Clematis Rules
What is a clematis support for?
Clematis is basically a climbing vine plant. Therefore, if it is not put on a support, then the branches will creep under your feet. Having started it on a support of the necessary form, it is possible to create a screen and decorate a garden, arbors, a house wall, even trees.  In addition, clematis develops better on the support and blooms more beautifully. Some varieties can produce new flowers up to three months in a row. In this form, the integrity of the plant is perfectly preserved, because it does not tread and does not break.
Reliance on clematis and perform a hygienic role.If plants are put on the ground, they will be poorly ventilated, and moisture will start to stagnate, which only creates a favorable environment for the development of various diseases.
What you need to create support for clematis
 Having decided to establish a support for clematis, it is necessary to consider and select the appropriate options, decide which type of support is best suited for a particular situation and what materials will be needed for it. Type is selected based on the biological and decorative characteristics of the variety that will grow in your area.
For example, the varieties "Jubilee 70" and "Cosmic melody" are suitable for creating carpet-type compositions. They have an arrangement of flowers during flowering is evenly from root to top.As garlands and cascades, the Serenade Krim, Biryuzinka, and Mountaineer varieties are used.
If you plan to use a cylindrical support, use varieties that do not cling during growth: “Gray bird”, “Memory of the heart”, “White dance”, “Anastasia Anisimova”, “Alyonushka”.
When planting clematis and deciding which support to choose, keep in mind that it will be closed by the plant only in summer. The rest of the time, his footing will stand uncovered. Therefore, make it so that it fits beautifully into the design of your garden and without a plant.
You must also take into account the peculiarity of the soil on which the structure will be installed, because the mount must be reliable and able to withstand the weight of the overgrown plant.
As for the material for creating the "stand", it depends on what kind of support for clematis you stop. It can be metal or wooden lattices from planks, arches and stairs made from metal or wooden rods, a metal lattice or just a rope, which is set on a given perimeter. They can be mounted to the walls, decorate paths, windows, entrances, decorate trees or specially installed pillars.
How to make a support for clematis do it yourself
Now let's figure out how to properly do support for clematis with your own hands.
Wicker support of twigs
 Such a support looks spectacular, even when the plant has not yet enveloped it. For the manufacture of structures you will need a twine, an ax, a wicker or a rod, a few pairs of high poles.
The poles are sharpened from below and stuck vertically into the ground where the clematis is planned to land.
From the branches or vines weave two rings of such a size so that they can snuggle tightly against the poles.
How to make a trellis using wooden beams
 Another idea of support - trellis for clematis, which can also be made with your own hands. To do this, we need to take wooden slats and bars up to 5 cm thick. Lay a frame from the bars, on which slats are laid in the form of a grid.
Horizontal overlap from the front, vertical, which run perpendicular to the first layer - from the back side of the frame. They are fixed with screws or glue, but with the help of screws it is necessary to fix the intersection of the rails (this is more reliable).
Now on the place of installation of the trellis it is necessary to fix the supporting pillars. If clematis is planted at the track, and a trellis is placed on it, then they are mounted with metal corners. The same corners must be attached to the posts and the trellis itself. That the design was reliable, to it establish additional support. For example, if the tapestry is not far from the wall of the house, it can be supported on the wall with additional bars.
Creating a support for clematis from the netting of the chain-link
If you do not have the desire or the ability to create decorative structures, you can make a support for clematis in other, simpler ways - there are many ideas for this among gardeners. For example, you can install a regular netting net. It is simple, economical, but no less impressive when the plant twists it.
So, to create such a support, you will need a chain-link mesh of the desired size, thin metal wire, three plastic or any other thin support and an old electric cable (or something that can replace it).Also prepare for work pliers and a screwdriver.
 It will be the hardest to stretch a netting net on supports as it twists and gets tangled. To do this, take the old electrical cable, divide it into two parts and spread on the ground parallel to each other at a distance of the width of the grid. Be sure to fasten these parts on the ground, making it easier for you to attach the grid to it. As soon as fix it, it will be possible to pass to support.
Two of them are located on the sides, and one on top of the grid. First, the side supports are threaded into the mesh stretched on the cable so that about 20 cm of the net-free end is left below. This part of the support will enter the ground. The third support is passed through the top of the grid to impart stability to the structure. In the joints, supports must be secured with a thin wire.
Now the structure must be installed at the chosen place, usually at the fence. The legs are immersed in the ground at a distance of about half a meter from the fence, and the top is leaned against it and secured with screws.
The plant clematis is often used to decorate the porch, and the question "How to make a support in this case?", Is solved very simply.Tapes are formed from a cord or wire, which are mounted under a canopy or above the door at one end, and the other to a peg driven into the ground next to the bush.
How to make an arch for clematis
 Arches are considered the most beautiful supports for these plants. However, ready-made options are quite expensive, so many gardeners prefer to do them yourself.
To do this, you will need two long duralumin tubes (about 3 m), five short (about 0.5 m), welded mesh in PVC insulation, enamel and stainless screws.
Now we measure the two sheets of the grid so that they are two more cells wide than the width of the installed structure, but the length must exactly match. On the edge of the mesh, nippers form protruding twigs (approximately 40 mm), with which it is attached to the arch. Securely tightening each of them around the duralumin tube, install the arch, immersing its base in the ground about half a meter.
Clematis Rules
 Whatever support you use, in the lower part of the structure, clematis stems must be tied up with a string, and then twisted around them several times around the net or tube. Further, this procedure can be repeated only as needed.
Usually the plant itself weaves along a given route, and the only exception is the small-flowered varieties, which must periodically tie the tendrils onto the net and direct their growth.
Clematis with large flowers grow to 3 meters in height. They look good in evergreen shrubs and trees, although small-flowered trees adorn tall trees, as they give strong growth and strong shoots. In any case, by twining the branches of trees and shrubs, falling down on a thick carpet to the ground, such plants form beautiful compositions, especially during flowering.  Clematis is ideal for creating spectacular partitions, fences and other garden decorations. It is only important to find the right support for this plant. It is chosen mainly on the basis of the gardener's design decisions, although it is necessary to take into account the plant variety: flower color, diameter, flowering time.
There is a huge variety of designs that are easy to make with your own hands. Many of them are quite massive and are installed for a long time. In this case, it must be remembered that in the fall, winter and spring, when clematis does not cover the support, it should harmoniously fit into the overall design of the site.