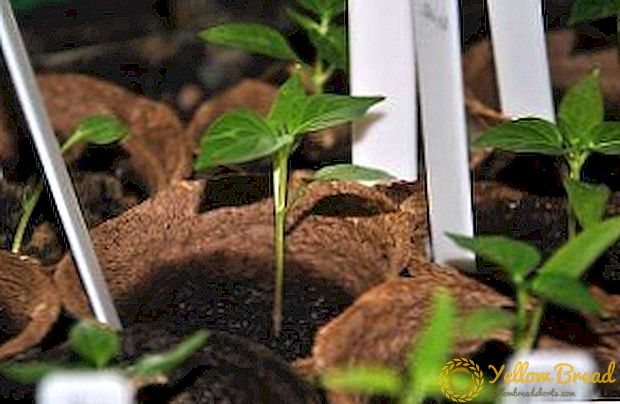
To enjoy garden vegetables and fruits all year round, you need to take care of winter heating for the greenhouse. Previously, this approach was popular among farmers, but now ordinary gardeners are interested in them.
In the article we will talk about how to build a winter greenhouse with heating do it yourself heating systems greenhouses and how to make heating in the greenhouse with their own hands.
Heating greenhouses: ways
How to heat a greenhouse in winter? Now there are lots of ways to make greenhouse heating do it yourself Each of them has its own advantages and disadvantages, therefore, to choose the ideal option for heating greenhouses with your own hands, you need to pay attention to the following selection criteria:
- the size of the greenhouse;
- financial opportunities;
- climatic features of the region;
- the need of different greenhouse plants for heating.
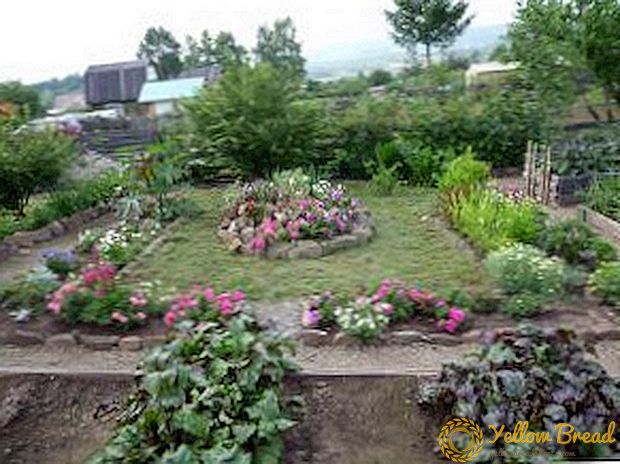
Winter heated greenhouse - projects, photo:

Solar
This is the most natural heating method. In order for the sun to better heat the greenhouse, you need to place it in the most sunny place and choose a suitable covering material. The ideal coating is considered glass.
The sun's rays pass through the cover, warm the earth and the air. Heat is given back much weaker due to the density of the structure and covering material. The greenhouse is best heated hemispheres or arches.
Advantages:
- profitability;
- environmental friendliness.
Disadvantages:
- in winter this method can be used only in the southern regions;
- at night the temperature may drop sharply, which will cause the death of plants.
Electric
How to heat a greenhouse in winter? The following method of heating a greenhouse in winter - electric. For a small and hermetic structure, this would be ideal.
 There are different ways electric heating greenhouses in winter:
- convection systems;
- water heating;
- infrared heating;
- air heaters;
- cable heating;
- Heat pump.
Heaters for greenhouses have different mechanism of action.
The common advantage of such constructions is that they react to temperature changes and automatically create perfect microclimate. With proper placement of electric heaters, the greenhouse will heat up evenly, which will significantly improve plant growth.
Advantages:
- profitability;
- mobility (most of these devices can be configured under the parameters of any greenhouse);
- ventilation.
Disadvantages:
- if there is a shortage of heaters, the air will warm up unevenly;
- Soil heating possibilities are very limited.
Airy
System air heating installed during the construction of the greenhouse. Its installation is very complicated, therefore a specialist should deal with this matter.
How to make greenhouse heating? Special heating and ventilation devices are installed in the foundation of the foundation and in the framework of the building, which distribute warm air in the upper part of the greenhouse. Due to this hot air does not get onto the plants themselves and does not burn the tender leaves of the seedlings.
To heat the soil around the perimeter of the greenhouse can be installed perforated heating hose.
Winter greenhouses with heating - photo:

System "warm floor"
With the help of "warm floor" you can warm the soil. Such a system can be made for heating the greenhouse in the winter with their own hands.Installation of the structure is simple: you need to remove part of the soil, cover the trenches with sand, lay a layer of thermal insulation material, lay the cable with a snake and refill it with sand and soil.
Such a system allows to save on installation and operation. In addition, its advantage is the ability to automatically adjust the heat and evenly distribute heat throughout the greenhouse.
Biological
Villagers still use the easiest way to heat greenhouses - biological. In this case, heat is released due to the decomposition of organic substances by microorganisms. Horse manure is commonly used as a heating substance, since it is able to reach temperatures in 60-70ºС for a week and keep it up to 120 days.
Advantages:
- the air of the greenhouse is saturated with carbon dioxide useful for plants;
- manure also serves as fertilizer;
- thanks to evaporation, air and soil are constantly moistened.
Disadvantages:
- in the southern parts Of Russia This method is suitable for winter, but for Ural it is advisable to use it only in the spring;
- horse manure is difficult to find, and other organic matter (compost, garbage) warms up longer and loses heat earlier.
Oven
How to heat a greenhouse in winter? Stove heating It has long been used by garden owners.
 In winter, the usual stove stove can for a long time maintain the optimum air temperature in the greenhouse - about 18ºС.
However, this method is only suitable for southern regions of Russia: a Siberian frost such a stove can not cope.
By virtue stove heating is cost-effective: materials for the stove-stoves are relatively inexpensive and installation is easy to carry out personally.
Heat can be obtained with any solid fuel - firewood, coal, sawdust, rags, packaging materials. The resulting waste, ash and ash can be used to fertilize the beds.
Disadvantages of furnace heating:
- the air does not always warm up evenly: a heat zone forms near the stove, in which the plants may die;
- wood stove - fire-hazardous design, so you need to pay special attention to thermal insulation;
- time-consuming heating process: the structure will function properly,only if you regularly throw fuel in the stove.
And also in the article, how to build a winter greenhouse with heating.
Wood stove with their own hands
Such a greenhouse heating can do it yourself. To do this, you will need the following materials and tools:
- heat-resistant metal sheets;
- pipes of the same diameter made of cast iron, steel or ceramic;
- metal rods and corners;
- tape measure and plummet;
- Bulgarian or scissors for metal;
- welding machine;
- bolts and couplings;
- burnt brick;
- clay and lime solutions.
Construction, its location and foundation
One stove can heat space in 15 m2. There must be at least 30 cm between the heating elements of the structure and the greenhouse walls.
 If the greenhouse is made of easily meltable material (polycarbonate, polyethylene), then this distance should be doubled.
Heating design consists of:
- fireboxes;
- chimney;
- chimney.
Fuel that burns in the firebox emits warm smoke. With the help of a chimney, it spreads throughout the greenhouse, heating the air, and then comes out through the chimney.
Heating greenhouse bourgeois hands-on:
To make such a heated greenhouse in the winter with your own hands, you first need to do foundation. Thanks to him, the oven will not warp, its legs will not fall into the ground, and the risk of fire will be reduced to a minimum.
- For the foundation you need to prepare foundation pit depth of 0.5 m. Its area depends on the size of the stove. If you intend to impose a finished stove brick masonry, when digging the pit, this should be taken into account.
- In the finished pit you need to fill a mixture of sand, fine crushed stone and brick fragments. A layer of 15-20 cm will be enough.
- Now you can install wooden formwork: the boards should be placed around the perimeter of the pit, and the gaps between them and the walls of the pit should be covered with sand.
- In the hole bounded by boards, you need to fill cementand then lay layer of ruberoid. This will give additional waterproofing, and the foundation will last longer.
- The final touch is laying bricks. They are put on the roofing material in two layers, fixing with the help of a clay-sand mortar.
Constructions:
There are different designs stoves burzhuekbut the simplest is the usual rectangular oven. It is better to install it in such a way that the furnace hole goes out. This will facilitate the process of heating, and the possibility of greenhouse smoke will decrease.
- The size of the stove will depend on the size of the greenhouse. Average parameters: width - 30 cm, length - 40 cm, height - 45-50 cm. Such a stove will be able to heat 10-15 m2 space. Given these features, you need to draw a diagram of the future design.
- The furnace is made from any heat resistant metal. Sheets should be marked and cut out the structural elements (bottom, walls and roof) with a grinder or scissors for metal.
- Now you should weld the bottom and three walls. Inside, to a height ¼ from the bottom, you need to weld metal corners. On them the lattice keeps within.
- You can buy the grate in the store or make it yourself from metal rods. The rods are welded together in such a way that a grating with holes is obtained. 1-4 cm2. The size of the holes will depend on the future of the fuel. The grate will hold the fuel, and the combustion products - soot and ash - will flow down into the ash box.
- In the future roof of the stove need to cut a hole for the chimney diameter 13-15 cm. Then the roof can be welded to the structure.
- On the front wall of the furnace you need to do two holes: one will put fuel in, and the second will be used as a blower. Through it you can clean the stove from the ash. The doors for the holes must be cut out of a metal sheet and attached to the wall with hinges. Handles should be attached to the doors.
- Now you can weld the front part to the stove. If it is intended to place the combustion hole outside, it must be covered. heat insulating material. Otherwise, the heated metal in contact with the details of the greenhouse will melt them.
- A short section of the pipe must be welded to the hole in the roof; chimney.
- To the bottom or the ends of the stove you need to weld metal legs and fasten them with a jumper. This will add constructions. sustainability.
- To reduce the risk of fire and increase the heat transfer time, you can impose a furnace brick masonry. This material retains heat longer: thanks to him, the stove will have to be heated less frequently.

Chimney
Chimney can be made either from a single pipe or from pipe sections of equal diameter. If the greenhouse is small and air heating is sufficient, chimney can be laid above the ground. If heating of the soil is required, an underground structure will do.
- Pipe sections for chimney need to bond together. To do this, you can use a welding machine or special couplings (clamps). In the latter case, the joints between the pipes under the sleeves are coated with clay.
- Chimney must be connected to the furnace with the same couplings or welding.
- If you intend to place chimney under the ground, then you need to dig shallow trenches (25-40 cm) and lay them in parallel pipes. The distance between the pipes should be from 60 to 100 cm. The pipes are filled with expanded clay or fine gravel, and their ends are led out of the greenhouse. This design will be the perfect replacement. "warm floor".
- If a chimney will be above ground, it must be installed on the supports. It is best to place it at a slight angle so that the end adjacent to the chimney rises slightly. This will increase traction.
- Overhead chimney need to cover with lime or chalk.Any deformation or rust spots will be visible on the white surface. This will help to easily control the condition of the structure
Chimney
This part of the design will allow smoke out outside the greenhouse.
- Pipe need to weld cover the chimney with thermal insulating material so that when the greenhouse touches the roof, the latter will not melt.
- Top pipe to wear spark arrester. You can buy it in the store or make it yourself.
- To prevent debris and sediments from entering the pipe, it should be covered metal cone.
- To regulate traction, inside the pipe set metal shutter. It is welded to a piece of thick wire. The ends of the wire lead from both sides of the pipe to the outside. By turning the ends of the wire, you can change the position of the flap and adjust the craving.

This will require a piece of flexible metal grill or a regular tin can.
In the bank you need to make a lot of small holes, and just twist the grille into the cylinder.
It can be made from a piece of tin or bought in a store. This construction can be fixed on the tube with thick wire.
Water tank
Near or on the stove can be installed water tank. It will allow to water the plants all year round with warm water. In addition, the water near the stove will maintain an optimal level of humidity in the room, which will have a beneficial effect on the condition of the green residents.
Now you know how to make heated greenhouse do it yourself With the help of a warm greenhouse, you can get a great harvest, even in winter. It is enough just to choose heating method. Any method is suitable for the southern regions, but residents of the north should prefer electric heaters.
Handmade greenhouse with heating will delight you year-round tasty and healthy harvest!